|
Page  1
2
1
2
 |
|
|
Fixing a Stuttering CD Player
(continued)
|
|
|
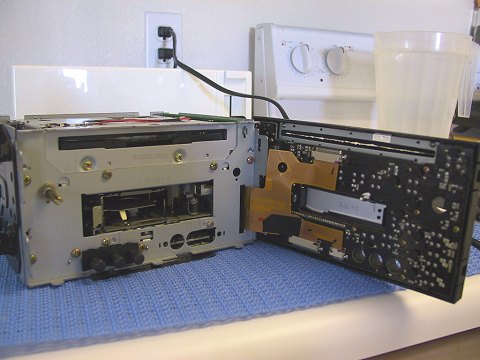
OK, now you're looking into the interior of the cage:

The remaining work should be done in a clean area.
|
|
|
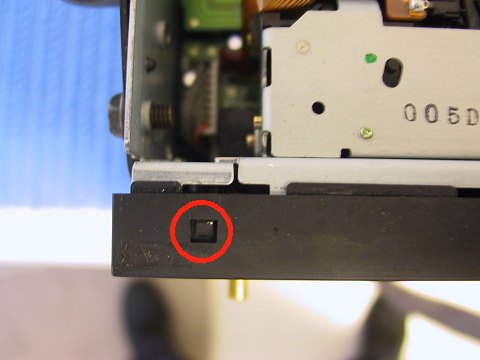
You'll need to pull the front panel off the unit. Make sure the power
knob has been removed (a flat-bladed screwdriver with some tape on the
blade works fine). The following series of photos shows the clips/snaps
that retain the faceplate to the cage.
|
|
|
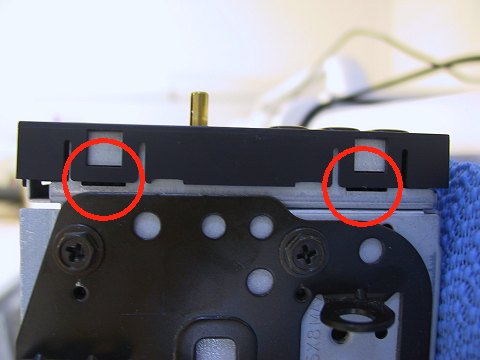
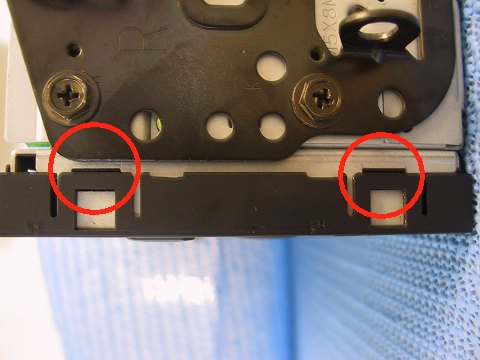
The faceplate does not need to be fully removed, as there are some
delicate flex connectors that attach it to the unit. I chose to ease the
faceplate off to the right-hand side of the cage and support it, as shown
in the following photos:
|
|
|
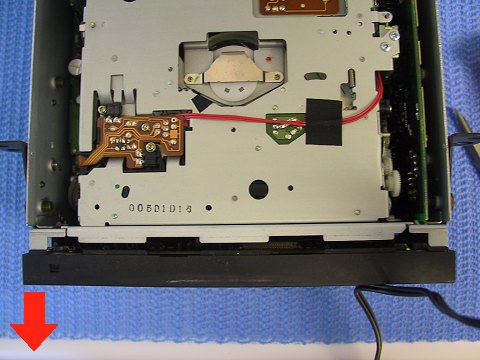
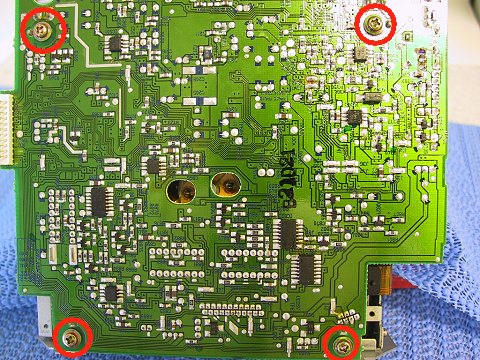
Next, remove the four screws that hold the CD player into the cage:
|
|
|
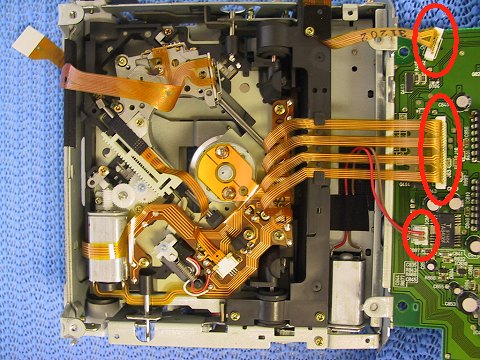
OK, now comes the toughest part, at least in my case. There exists a
circuit board connector that must be separated when pulling the CD player
out of the cage. Unfortunately, it was quite firmly attached, and VERY
difficult to reach:
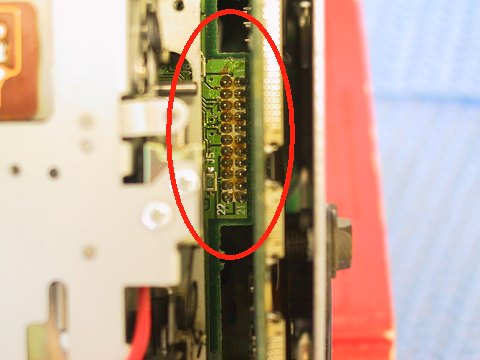
Simply pulling the CD player out of the cage stresses the circuit board,
and risks breaking it.
|
|
|
I scrounged around in my tool collection until I found a computer chip
removal tool that resembles a pair of special tweezers. It has tips bent
inward and flattened to slip between a chip socket and the chip itself.
Here's a photo:
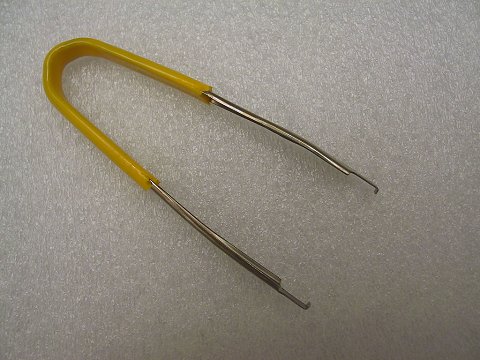
Even so, there is little room to work, so I had to hammer the sides of the
tool to make it narrow enough to slip down in to reach the connector. I
then applied upward pressure as I pulled the CD player out of the cage. It
took a while, but I did persuade the connector to come apart without
breaking anything.
|
|
|
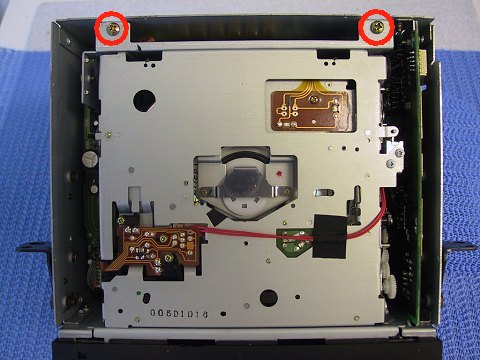
OK, now that you have the CD player out, you'll need to separate the
circuit board from the player mechanism. There are four screws on the
circuit board side that you need to remove. In my case, they were VERY
TIGHT, so be careful not to strip out the heads or apply too much pressure
to the circuit board:
|
|
|
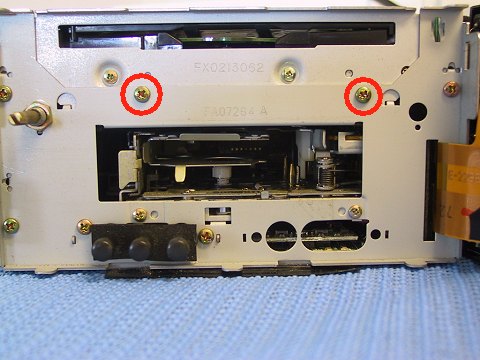
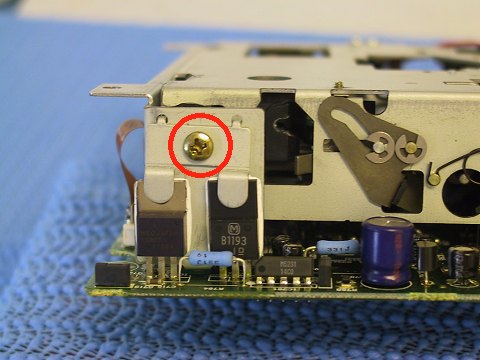
On the side of the player unit, there's one screw that simply needs to be
loosened slightly:
|
|
|
OK, with the screws removed, there's a fragile flex connector that needs
to be disconnected. If you've never encountered this type of connecter,
the flat Mylar "cable" has some tinned connections that are
inserted into the plastic socket on the circuit board. A plastic lock then
snaps the cable into the socket.
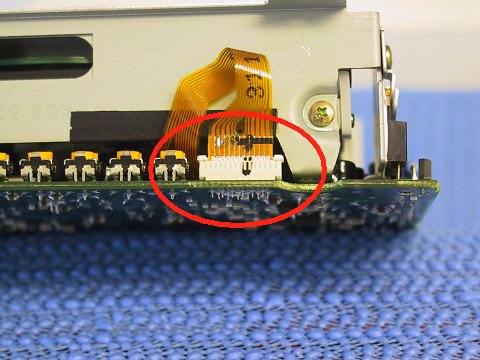
You'll need to gently (that's the byword for this whole procedure) pry up
the ears on the locking clip, then remove the cable from the socket. It's
actually simpler to do than to explain, but exercise care as you go.
|
|
|
Now you can swing the circuit board away from the player, starting at
the edge by the flex connector. There are some additional flex connectors
still attached, so use caution. Here's what remains:
You can remove the remaining connectors or, as I did, leave them intact
and make sure the circuit board is properly supported to avoid placing
stress on the connectors. It's up to you.
|
|
|
OK, I apologize for the fuzziness in this next photo (that's what
happens when you think you've mastered the camera), but I'm NOT opening
this back up to re-shoot it!
This small drive gear needs to be removed. There is a small E-clip on the
shaft that you can ease off with a small screwdriver. Don't lose it!
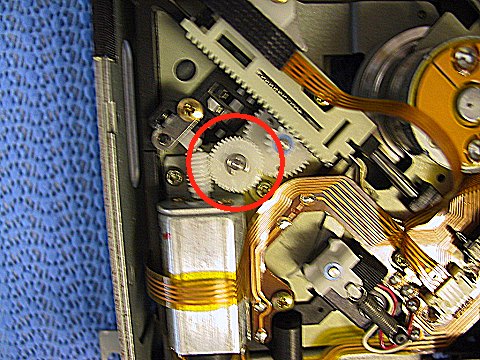
Once you've removed the gear, put it aside.
|
|
|
OK, all of the previous work was merely to get to the innards, and
here's where your hard work pays off.
If your player looks like mine did, there is some residue of some white
grease on the gear surfaces, and the steel shafts are also a bit dirty.
These need to be cleaned off. I used 91% alcohol, some Q-Tips, and some
small interdental brush tips like these:

Just be patient and clean all the crud off. Don't forget to clean the gear
you removed!
Once everything is cleaned, use a Q-Tip and some very light household oil
to lubricate the shafts and also the gears. Apply SPARINGLY!
|
|
|
Now you can turn to the CD lens. Move the lens mechanism all the way to
the outer range of its travel, then turn the unit over. Here's what you'll
see:
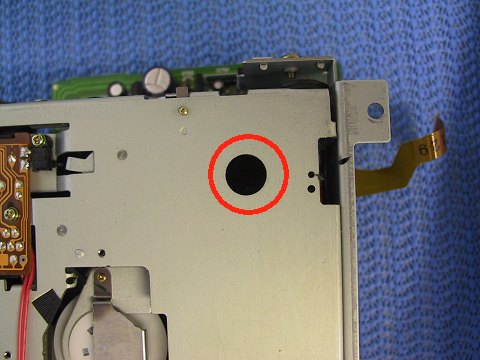
OK, there's not much to see in this photo, but inside that hole you'll see
the tiny glass lens of the CD reader. Using a steady hand, gently wipe the
lens clean with a Q-Tip and a small amount of 91% alcohol. I'm sure there
are some professional tools to do this, but I'm not a professional, so
this is what I used.
|
|
|
Guess what? That's IT! Well, there's the matter of putting everything
back together, but you can follow the photos for that.
|
|
|
If you listen to cassette tapes in your car, this is also a fine
opportunity to clean the tape pathway in the cassette player. I don't use
cassettes, but I got in there and cleaned anyway (it was FILTHY). It's
like replacing everything you can when you get the engine out of your MR2
-- the last thing you want to do is pull that engine again!
|
|
|
I'd like to once again thank Pete Hartwell for contributing the procedure.
|
|
|
|
|
|
Page
1 2
|
|
|
|
|
|
Dave Martin
1993 MR2 Turbo
|
|
|
|
|
|
|
|