Last Updated
27 March, 2005
 

  Jump to:    Front    Rear


UNDER CONSTRUCTION

Installing High & Tight
Prothane Suspension Bushings

Installing the Rear Bushings


As part of my engine replacement, I decided to replace my suspension bushings with High & Tight Prothane bushings. The rear crossmember and suspension arms had already been removed, so what follows here is a description of the installation for the rear components.
 
 
  The crossmember needs to be dropped to remove the upper 12mm sway bar mounting bolts. Since the crossmember was already out for the engine swap, this was the perfect time to replace the bushings:
Click to enlarge
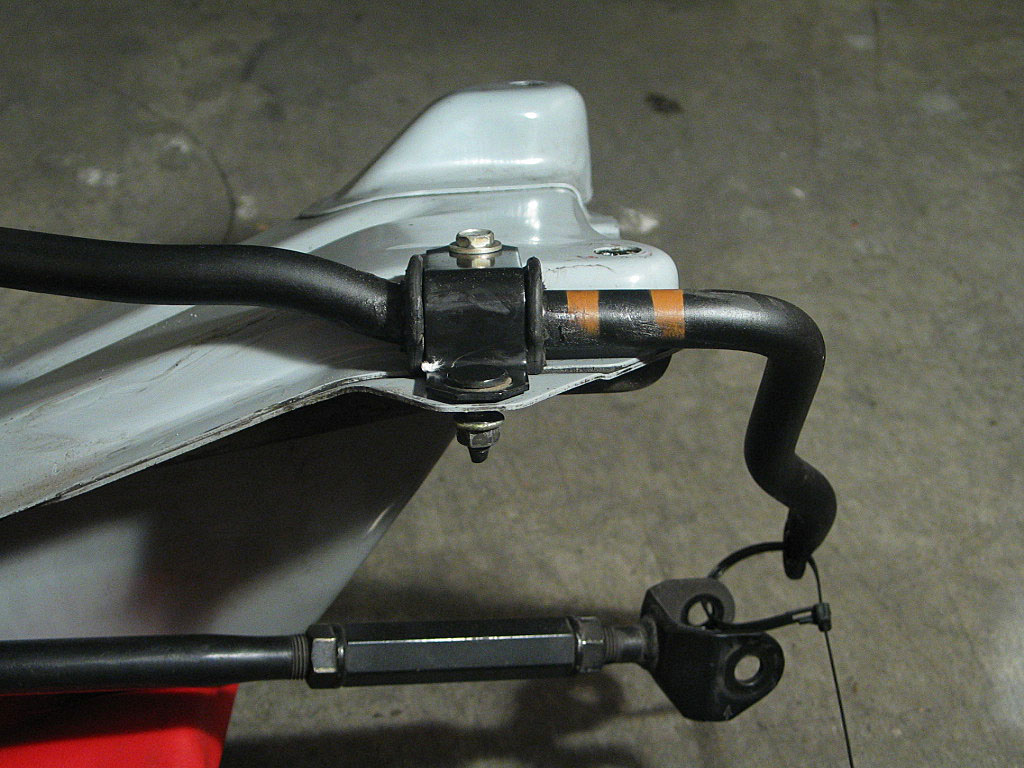
Remove the upper 12mm bolts and lower 12mm nuts, and the bracket can be removed. The bushing is split, so you can easily pull it off the sway bar.

I took a Scotchbrite pad and cleaned off the sway bar in the area where the new bushing would go, to provide a clean and smooth surface.
 
 
  Here's a photo of the new High & Tight Prothane sway bar bushing:
Click to enlarge
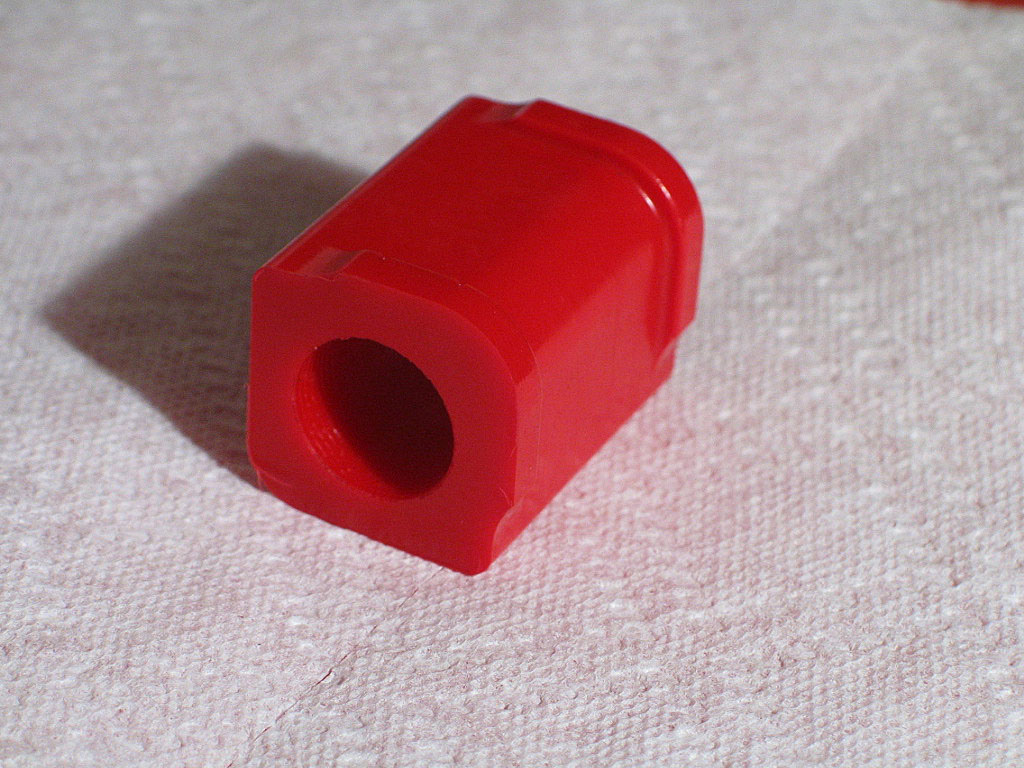
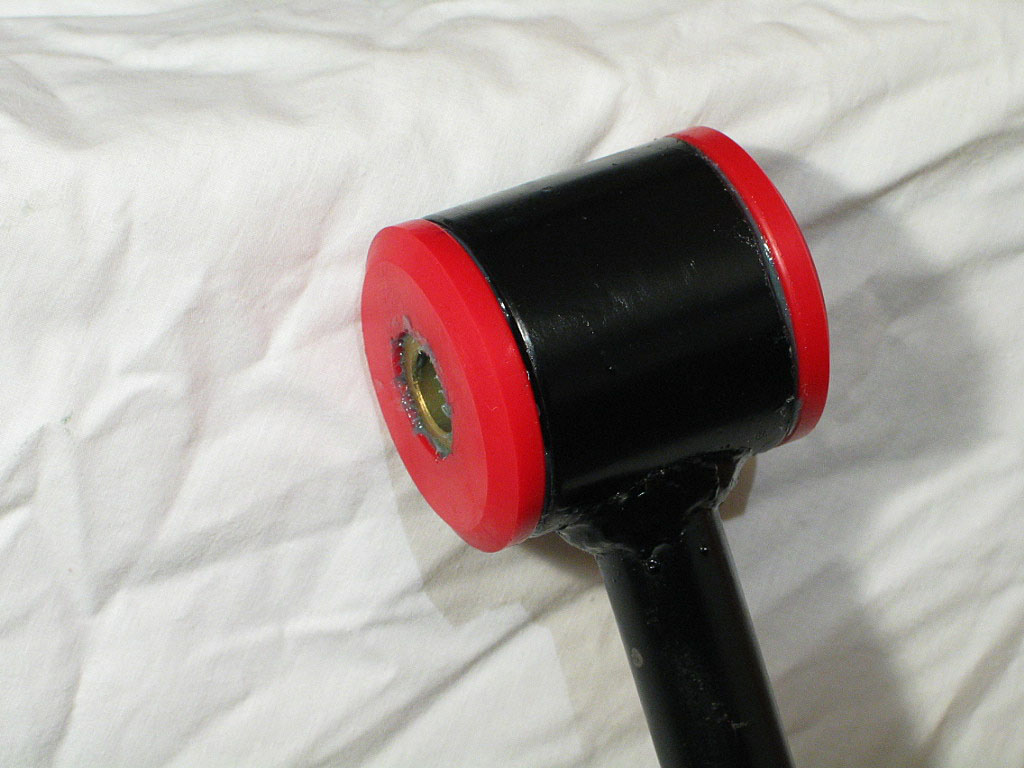
I greased up the bushing per the instructions, and installed it exactly like a stock bushing:
Click to enlarge
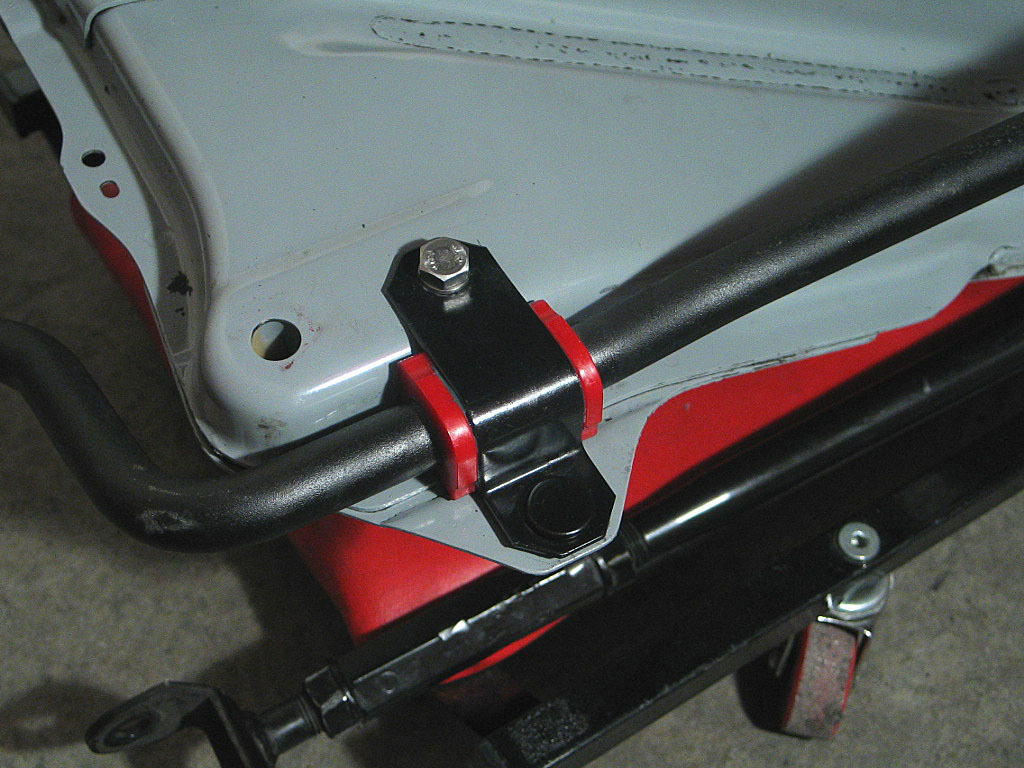
Torque the mounting bolts down, then replace the other one.
 
 
  Installing the High & Tight Prothane bushings was reasonably straightforward, thanks to Brian Peterman's site. The High & Tight bushings package does NOT include instructions.

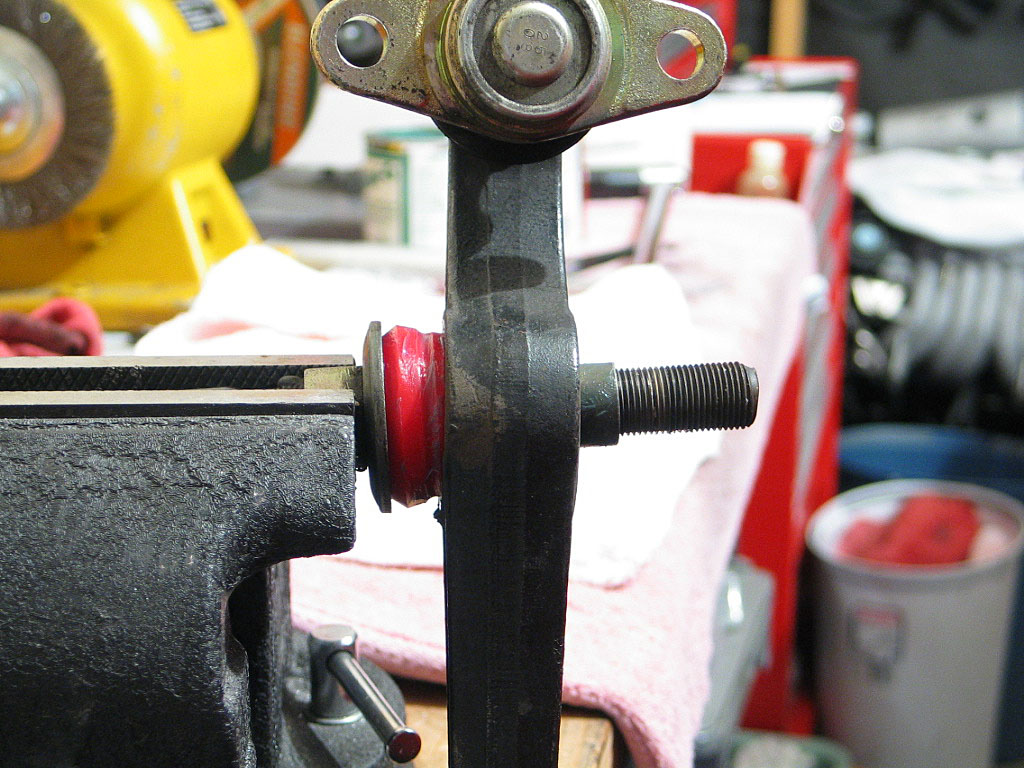
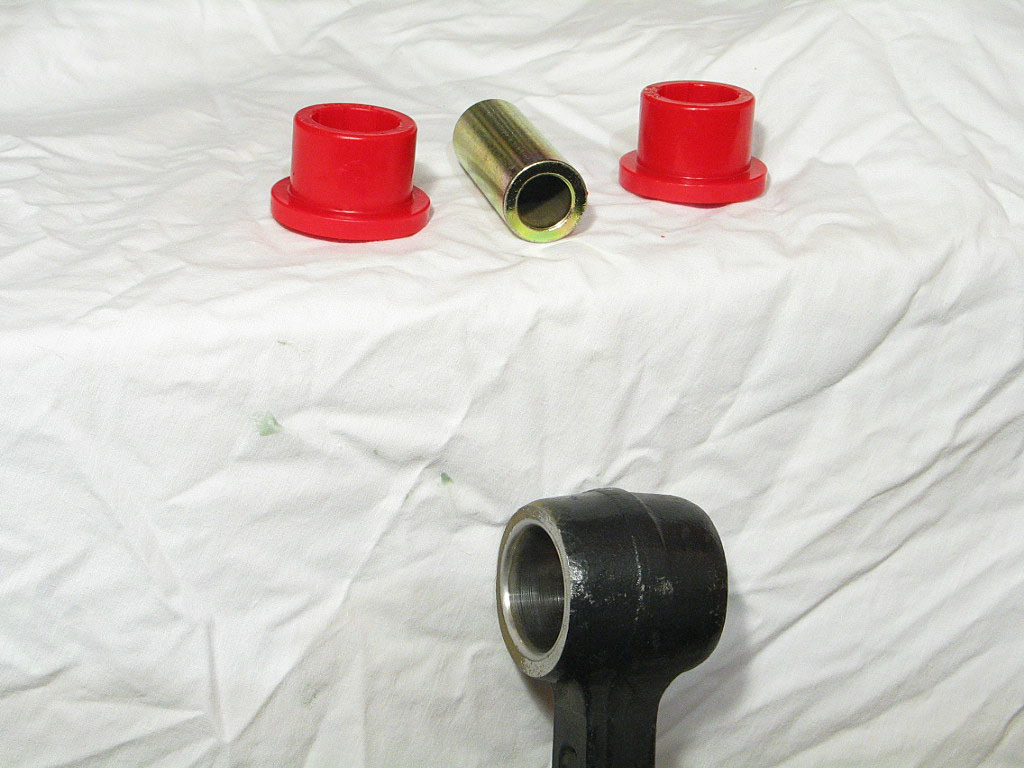
Brian describes his method for removing the bushings from the strut rod and lower arm, but burning the bushings out was not an option for me. I had a local machine shop do it for me.
 
 
  First, you need to disassemble the strut rod from the lower arm:
Click to enlarge
 
 
  I placed the assembly in my vise...
Click to enlarge
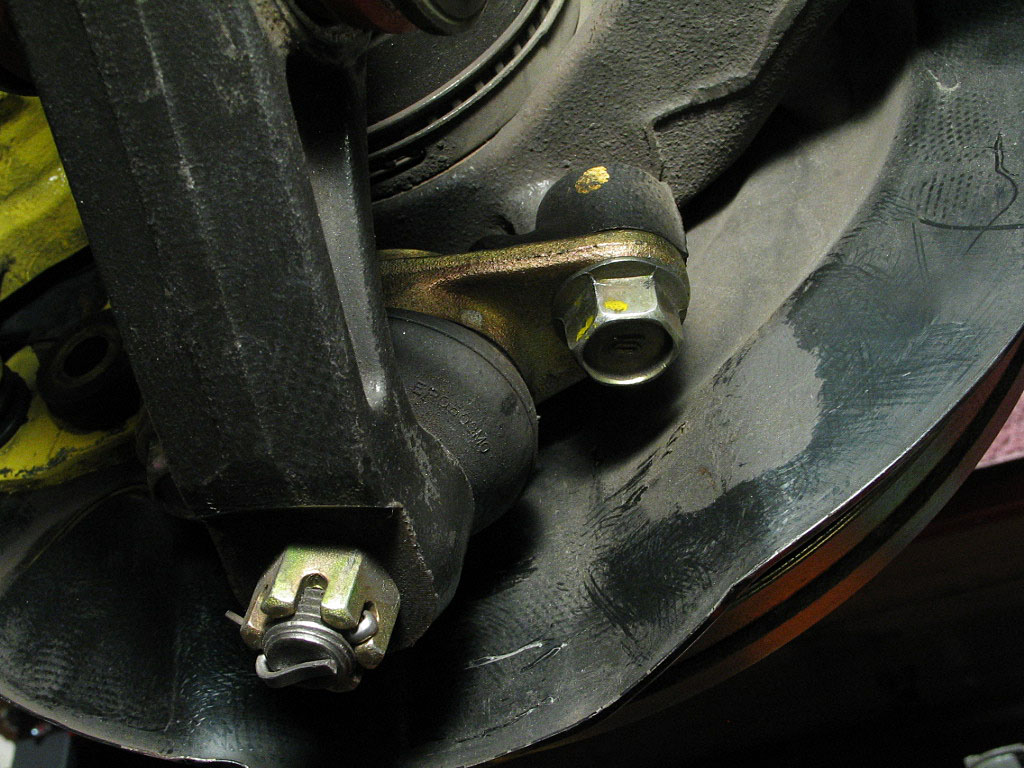
...removed the 24mm nut...
Click to enlarge
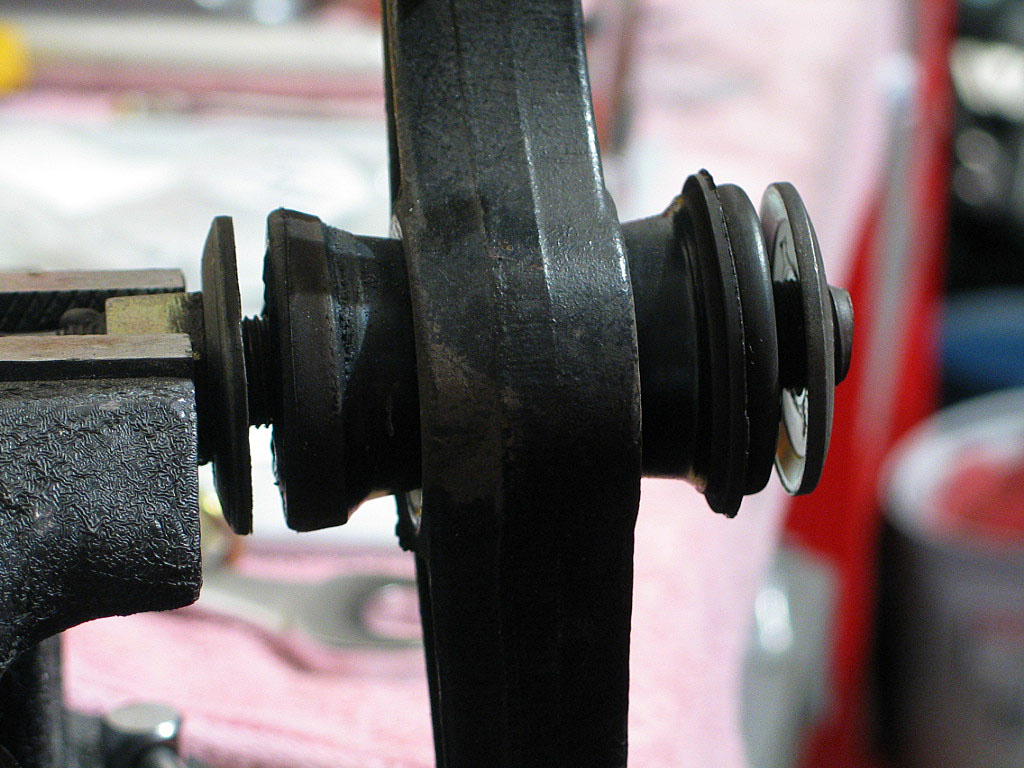
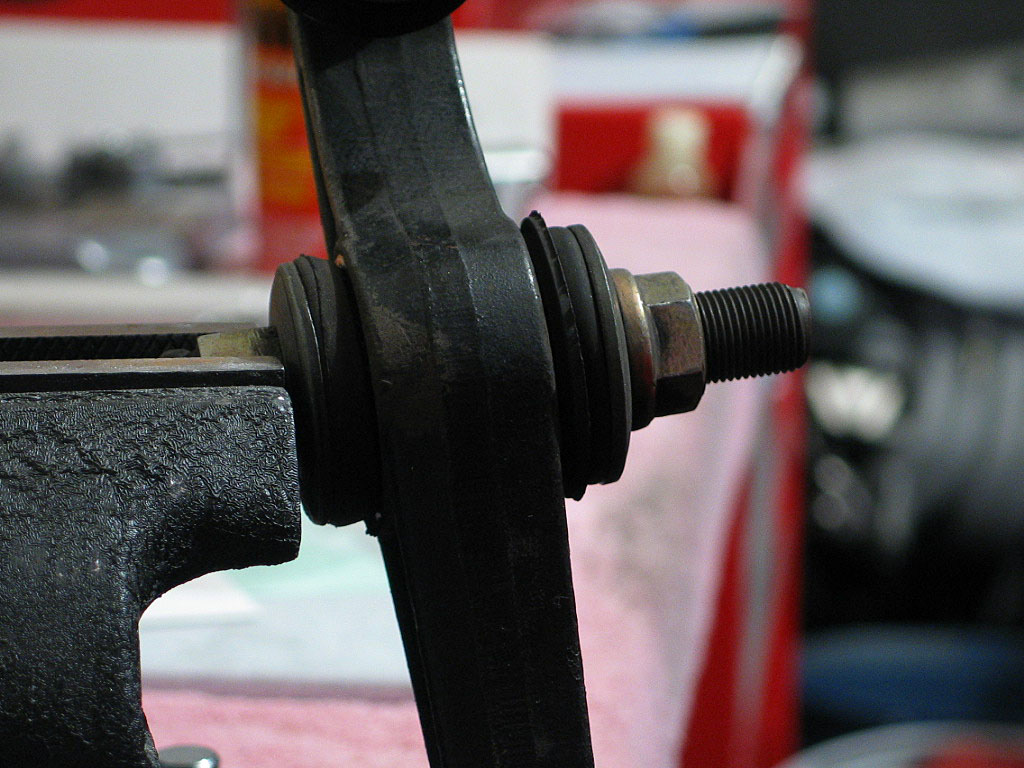
...and removed the lower arm:
Click to enlarge
 
 
  I then installed the cupped washer (you'll need to reuse the OEM part), applied a lot of grease to one bushing and slid it on to the strut rod. I didn't realize that the High & Tight bushing kit included a replacement sleeve for this, so I reused the original sleeve, which was in good condition:
Click to enlarge
 
 
  Install the lower arm...
Click to enlarge
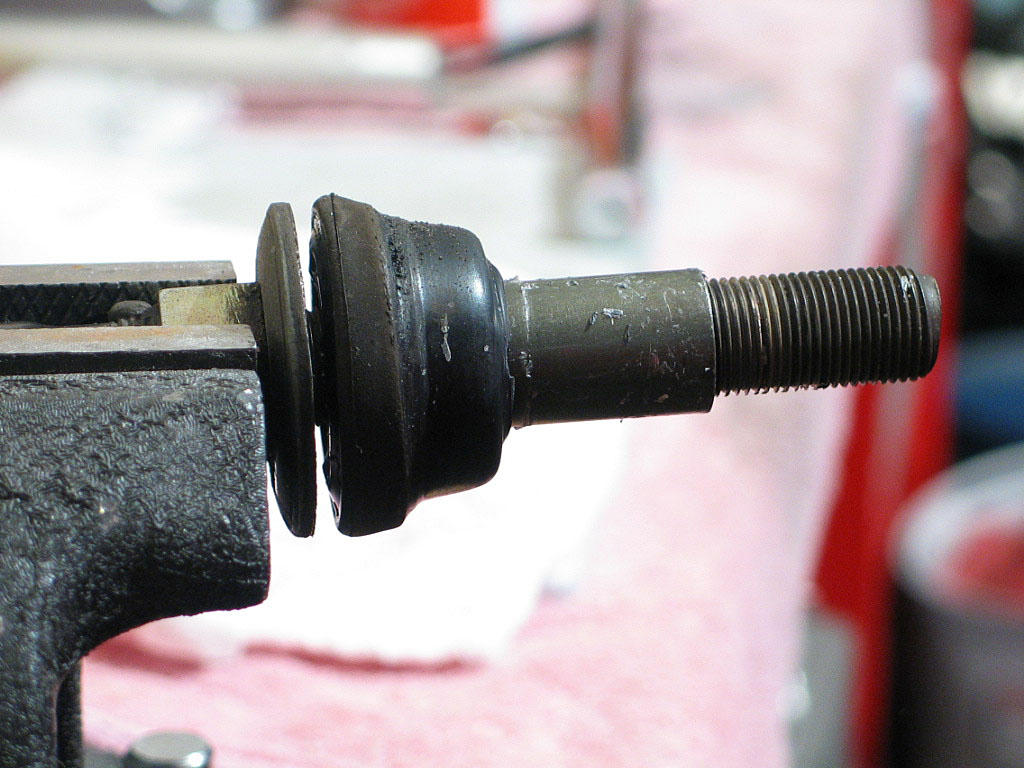
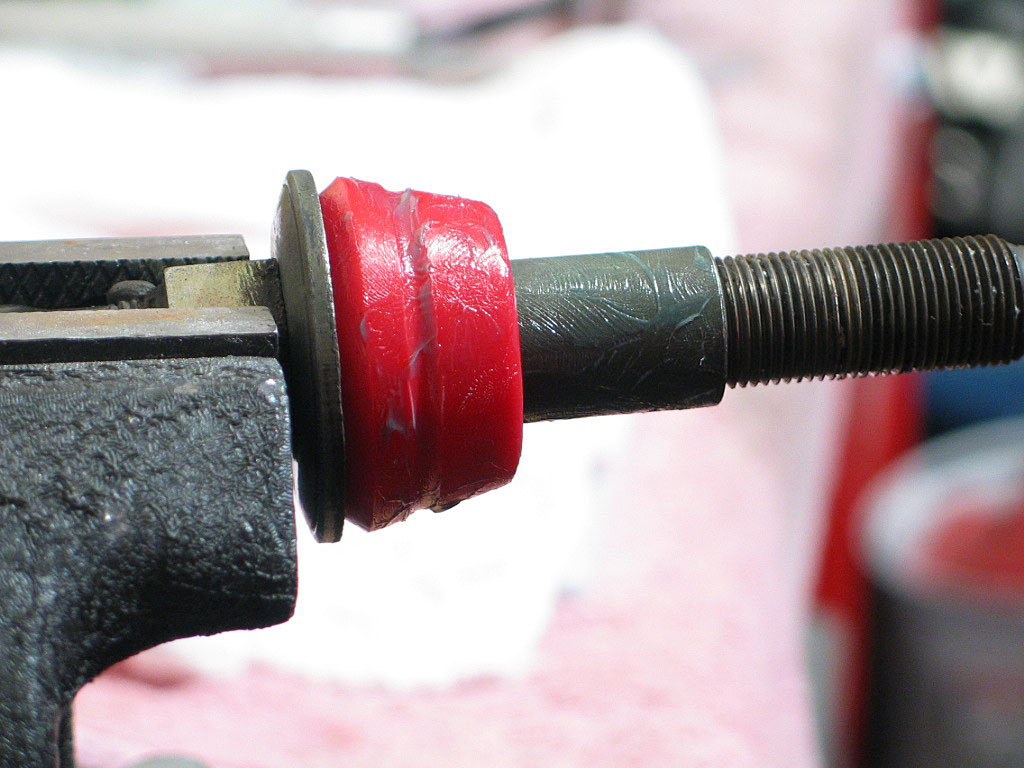
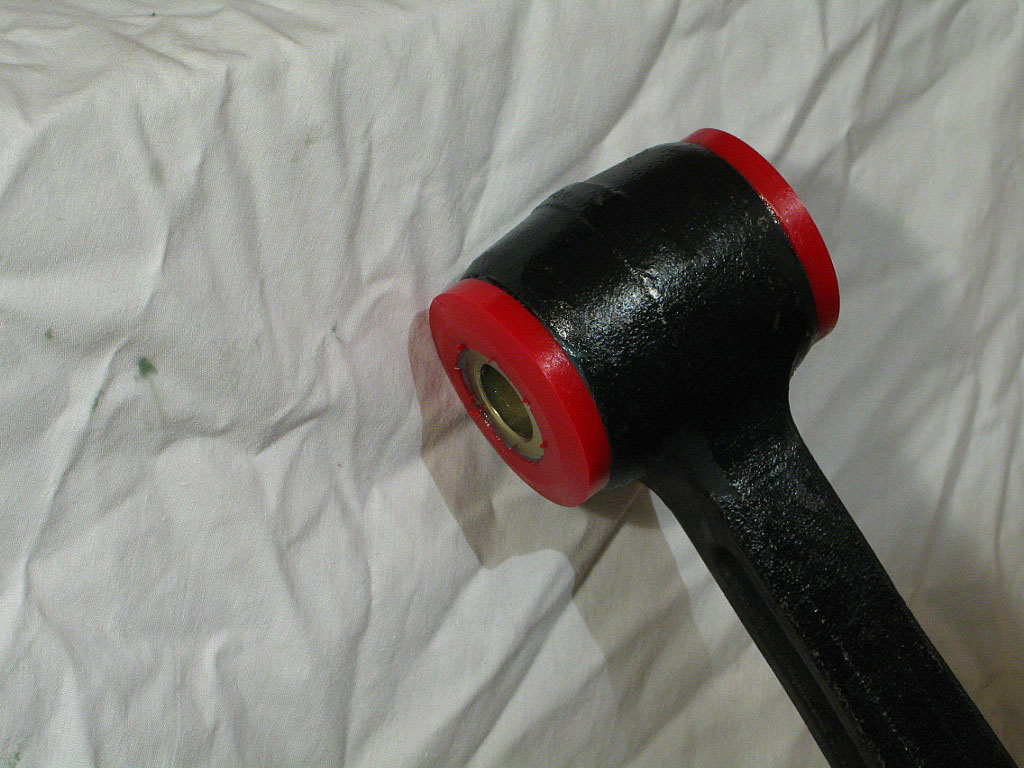
...install the other bushing...
Click to enlarge
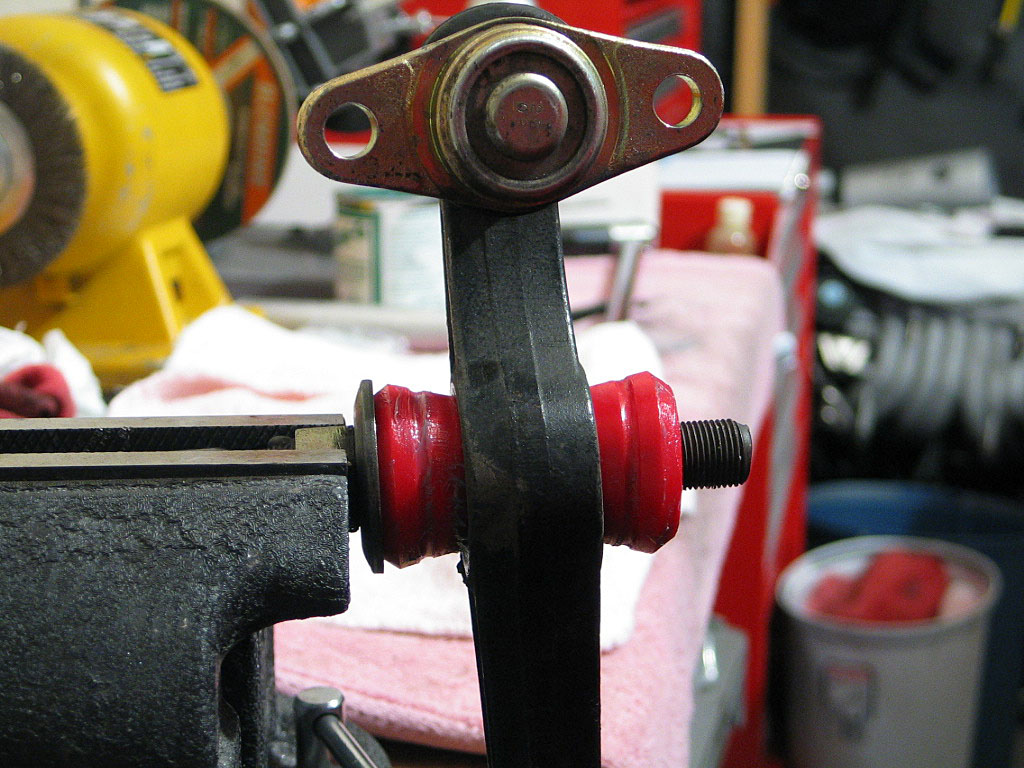
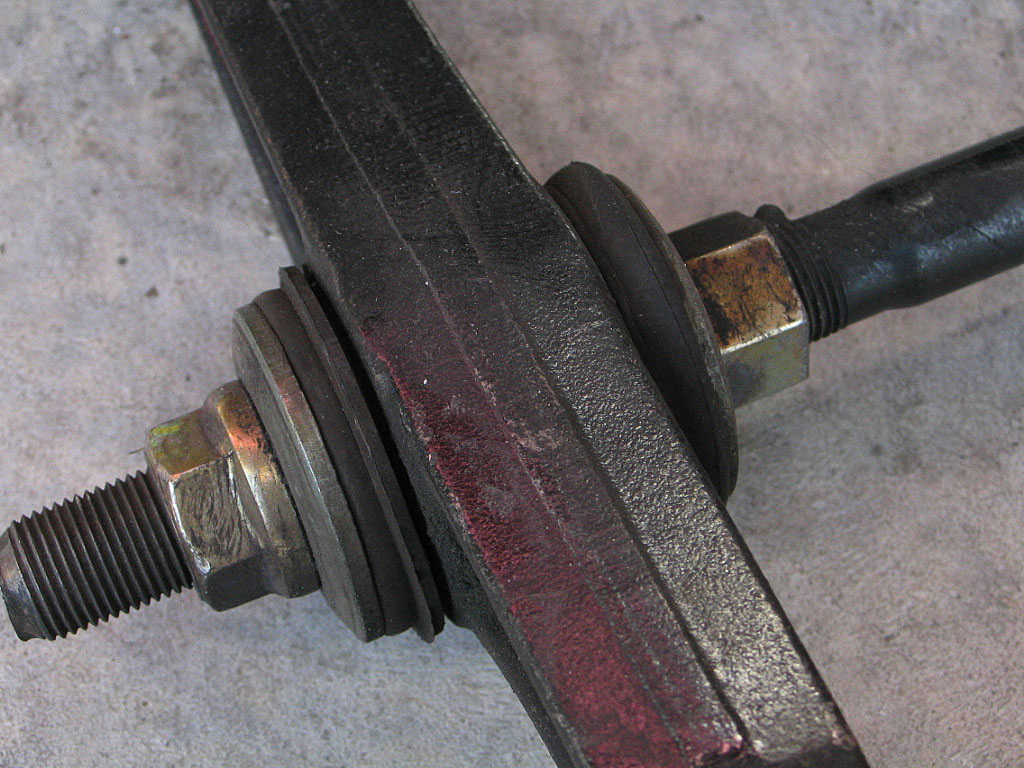
...install the cupped washer and thread the nut back on:
Click to enlarge
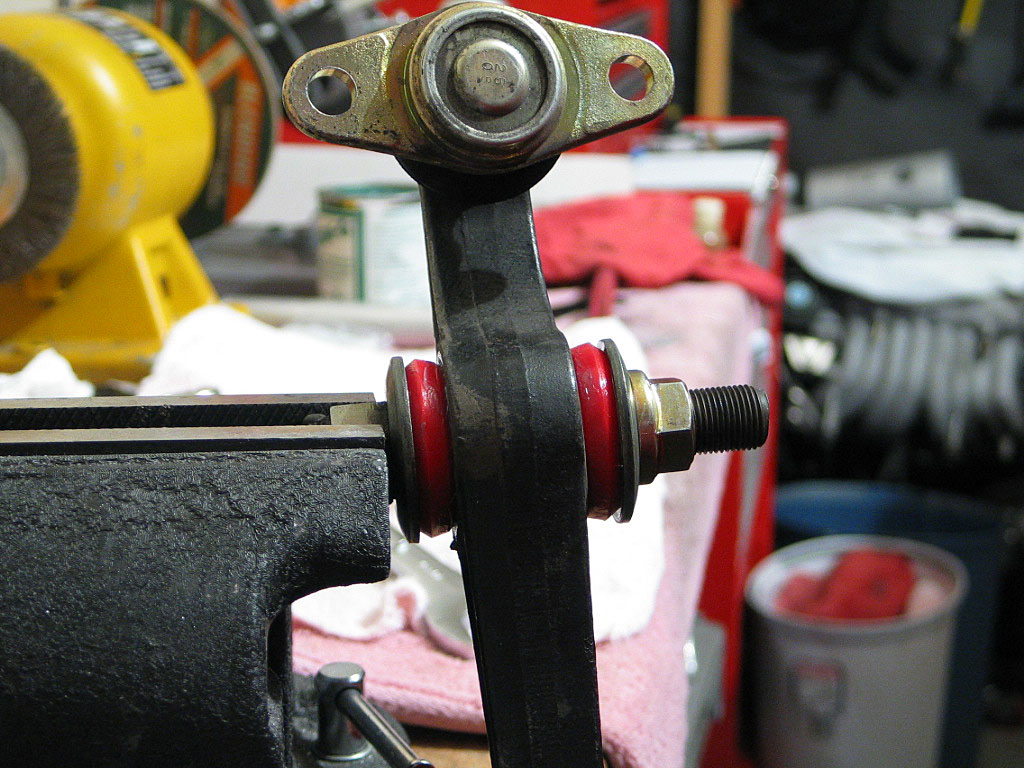
Don't crank the nut down tight, as it will be easier to install if there is some give to the joint.
 
 
  The other end of the strut rod gets the larger of the remaining bushings, plus the sleeve:
Click to enlarge
 
 
  Apply a liberal amount of grease to the bushings and sleeve, and assemble them into the strut rod opening:
Click to enlarge
 
 
  The smaller bushings are for the lower arm:
Click to enlarge
 
 
  Same routine as the strut rod -- apply grease to the bushings and sleeve, and assemble them into the opening:
Click to enlarge
We're now ready to install the assembly.
 
 
  I found that following Brian's steps didn't work for me. I think it might have something to do with the spring setup in the car. Quite a few owners install lowering springs, which are shorter than my Eibach Prokit springs. With the Prokits, the hub has spring tension on it even when fully extended, which makes it harder to install the lower arm, as you are fighting the spring tension.

So I changed the sequence. First, I installed the lower arm into the rear crossmember, installing the new washer facing the front of the car.
Click to enlarge
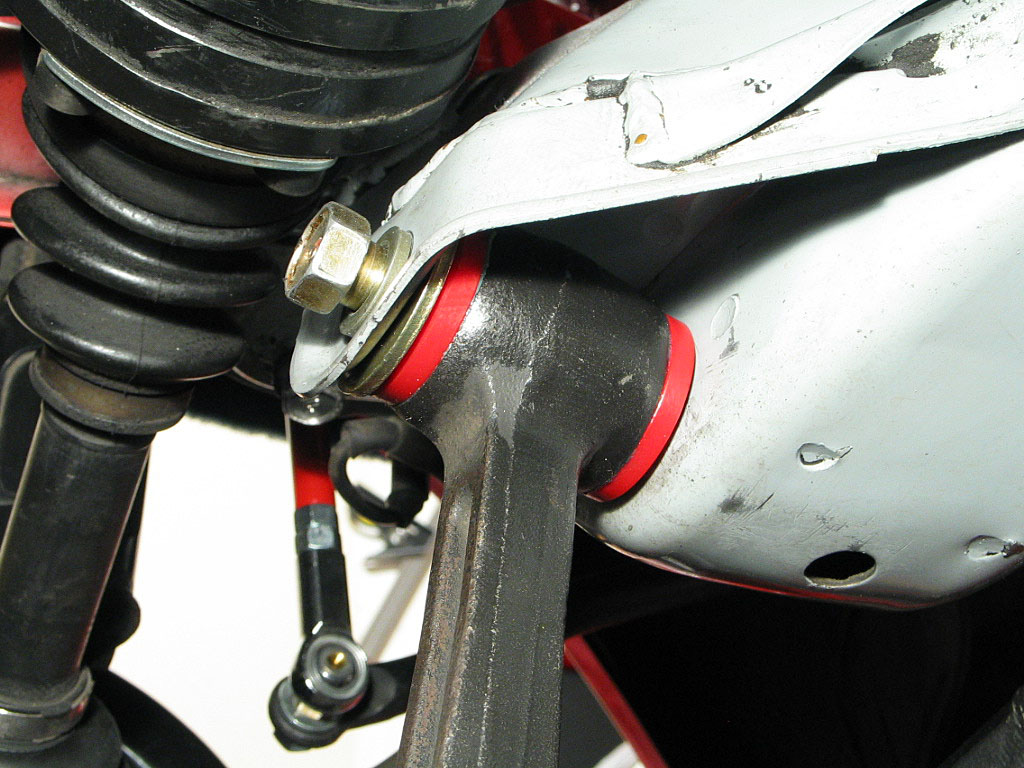
I had to use a rubber mallet to tap the arm and the washer in at the same time, as the fit was very tight. I then used a drift pin to align them with the hole in the crossmember. I inserted the 19mm bolt and just threaded it in a few turns.
 
 
  Next, I installed the strut rod end in its hanger:
Click to enlarge
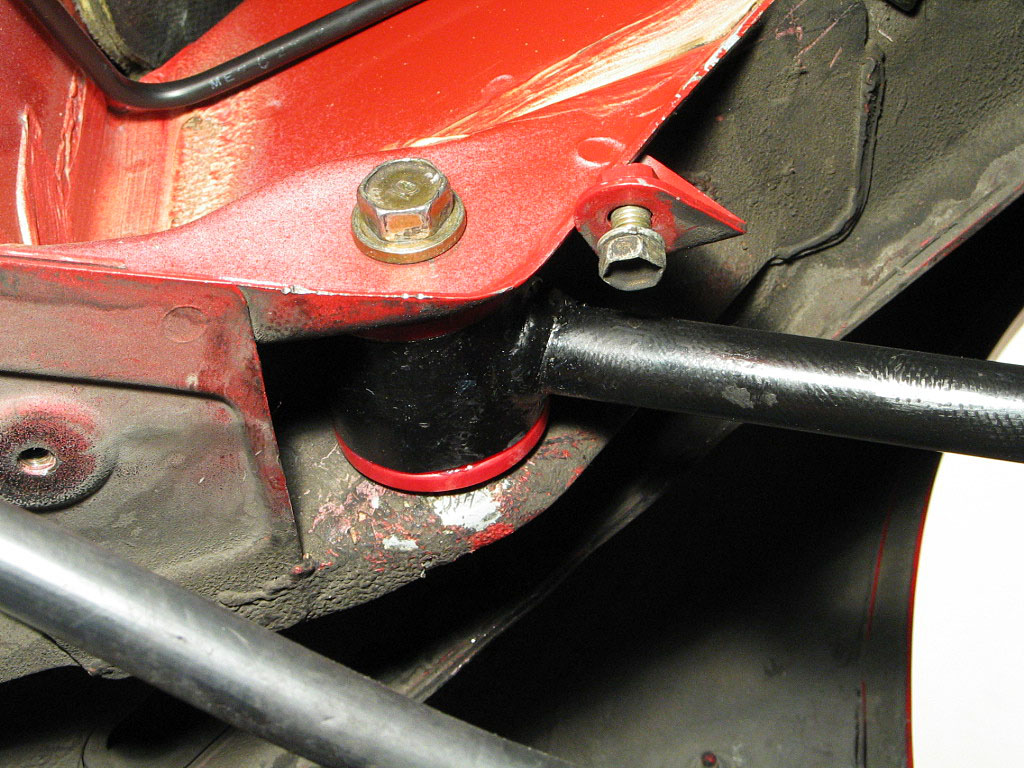
This was the toughest part, as the arm has spring tension on it. I was just barely able to get the 17mm bolt started in from one end. Then I was able to tap on the rod with a rubber mallet while forcing the bolt through at the same time. More hands would have been helpful here.
 
 
  Attaching the ball joint is a breeze, as it is very flexible and can be aligned easily. Two 17mm bolts secure it to the hub, just snug:
Click to enlarge
The two bolts can now be torqued to OEM spec. However, the suspension arm, strut rod, and lower arm all need to be tightened with the weight of the car on the wheels, after the suspension has settled.


  Jump to:    Front    Rear