|
Last Updated
17 July, 2006
|
|
|
Back to Start
Page
 1
2 3
4 5
6
7
8
1
2 3
4 5
6
7
8
 |
|
|
Rebuilding the 3SGTE
|
|
|
|
|
|
|
|
|
This section does not describe the process for
rebuilding a stock (or relatively stock) 3S-GTE motor. Many of the stock
components have been entirely replaced on this motor, such as the turbo
system, wiring, ignition, ECU, etc. Thus, it probably has limited value as
a "How-To" guide for rebuilding your motor.
However, it may help you to decide how far you wish to take your upgrade
plans. The 3S-GTE is a motor that responds relatively well to small,
affordable upgrades, like exhaust and intake improvements, a boost
controller, etc. However, once you install the "easy" fixes, it
can get
complicated and expensive very quickly. You don't want to be halfway through
your upgrade and find you simply cannot afford to continue. Hopefully,
this guide will show you what some of the modifications entail, and you
can price out the parts to get an idea of the overall material
costs. Also consider that there are considerable out-of-pocket costs
involved in simply putting the motor back into the car. Hoses, brackets,
fittings -- they add up very quickly.
Also, this section describes the work I was able to perform with the motor
out of the car on an engine stand. Work that was performed after the
engine was installed into the car is covered in the
Install section.
This includes much of the wiring, plumbing, etc.
|
|
| |
My friend Alex Labeur performed the actual
blueprinting and assembly of the long block. My role was deciding what I wanted to do to the motor, getting it
to Alex for the teardown and reassembly, and then putting everything back
together.
|
|
| |
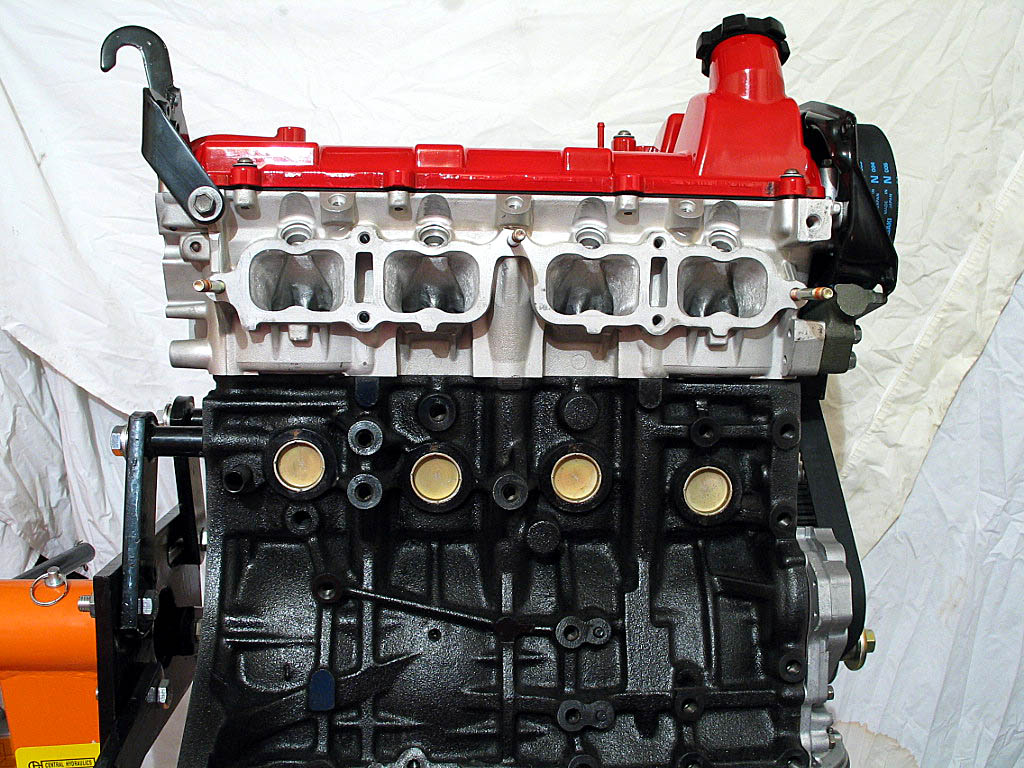
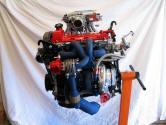
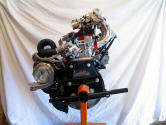
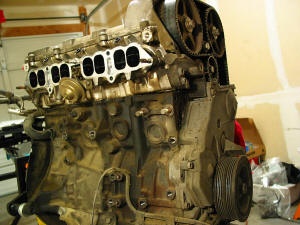
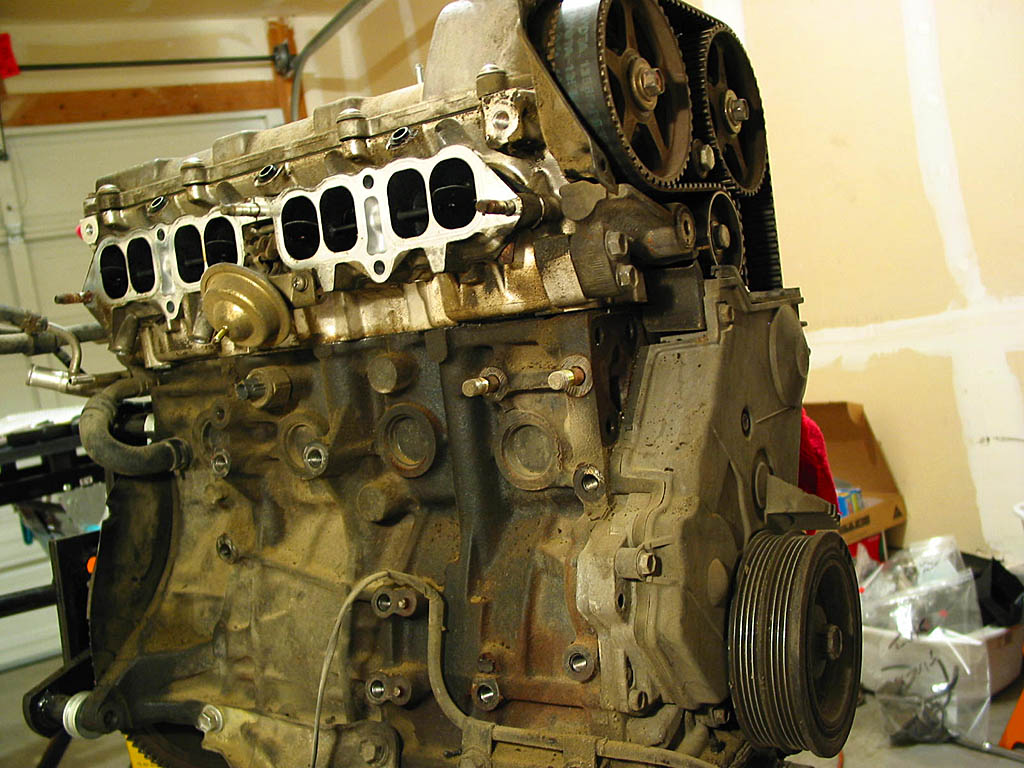
Once the motor was
removed,
most of the
extraneous accessories were removed prior to getting the long block to
Alex. Here's a photo of the motor more or less as delivered to him:
Alex then disassembled the motor, noting any indication of
stress or damage. He told me that there were small signs of detonation in
a few bearing surfaces, but otherwise things looked good. The motor was
pretty clean for 86,000 miles.
|
|
| |
Alex delivered the head, block, flywheel, and his 3SGTE
torque plate to Howard at Vegas Machine. Here's an itemized list of the
operations the motor received at the shop:
Hot-tank block
Deck block
Bore & hone block with torque plate
Resize big end without piston
Polish crank
Balance crank internal
Grind flywheel flat
Lighten and balance flywheel assembly
Tear down and hot-tank head
Mill heads
Valve job with oversize Si valves
|
|
| |
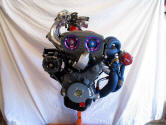
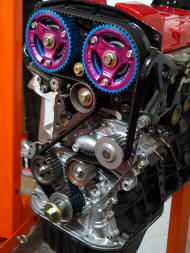
Once Alex got the parts back from the machine shop, he
proceeded to blueprint the new motor. The planned upgrades included JE
forged pistons (8.5:1 CR; .020" over), ARP rod bolts, head and main
studs, Si 1mm oversize valves, WebCam reground cams, Engle valve springs, and some cleaning out of the port
areas. The oil pump and water pump were replaced, as well as the cam gears
(with HKS adjustable units), timing belt, tensioner, idler pulleys, seals,
etc. This was essentially a brand new motor.
|
|
| |
Alex and I had discussed using
shimless buckets from the MR2 Spyder. This was
attractive from the standpoint of achieving a lighter valve train, but a
real pain for sizing the correct buckets, as the cams needed to be removed
for every "adjustment". However, this was the time to do it.
|
|
| |
The shimless conversion led to an unforeseen problem: the shimless buckets had only about half the adjustment range of the stock
shim-and-bucket arrangement. The combination of the new buckets and the
new valves resulted in a clearance gap between the valve stem and the
bucket, even with the thickest bucket available. The only permanent fix
was to reseat the new valves in the head a bit deeper. In essence, another
valve job was needed. I bit the bullet and had the work done.
|
|
| |
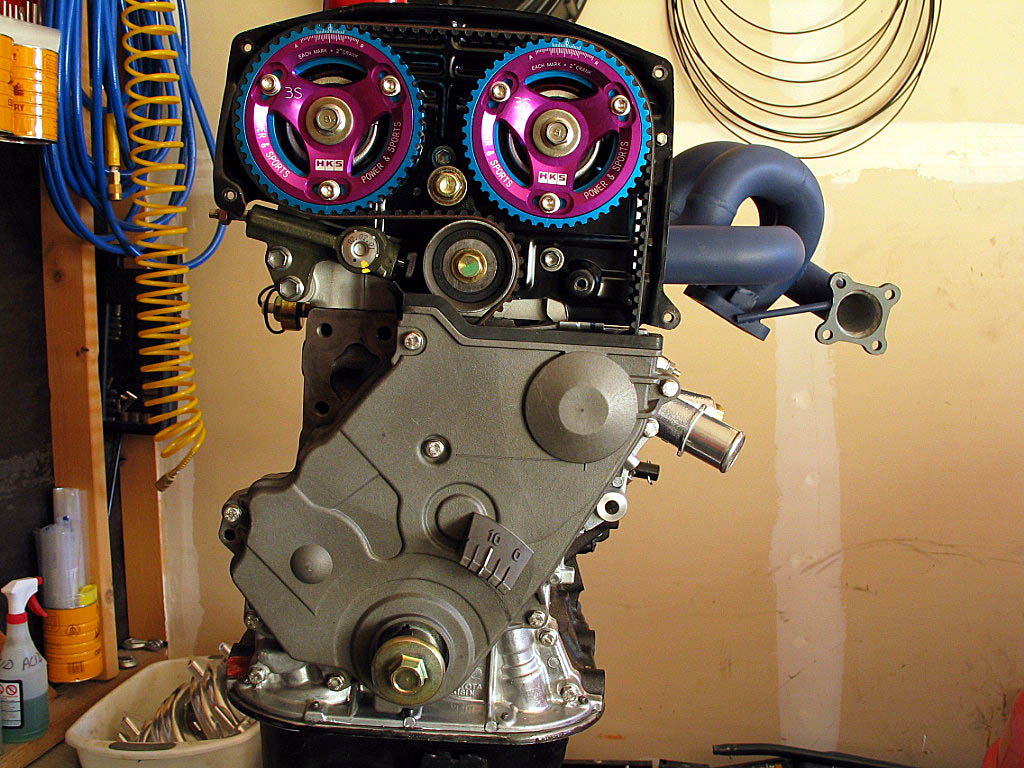
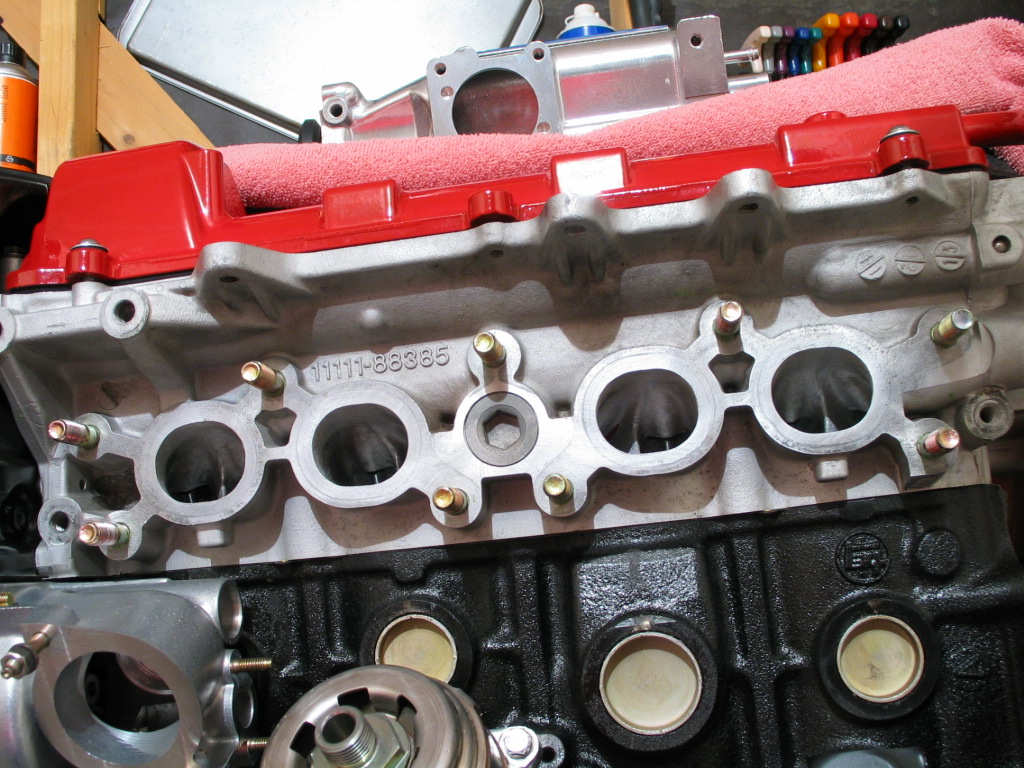
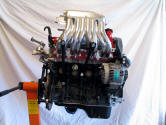
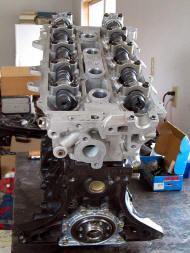
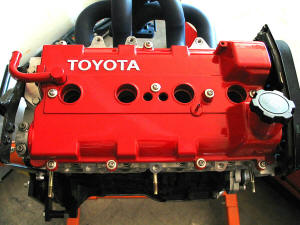
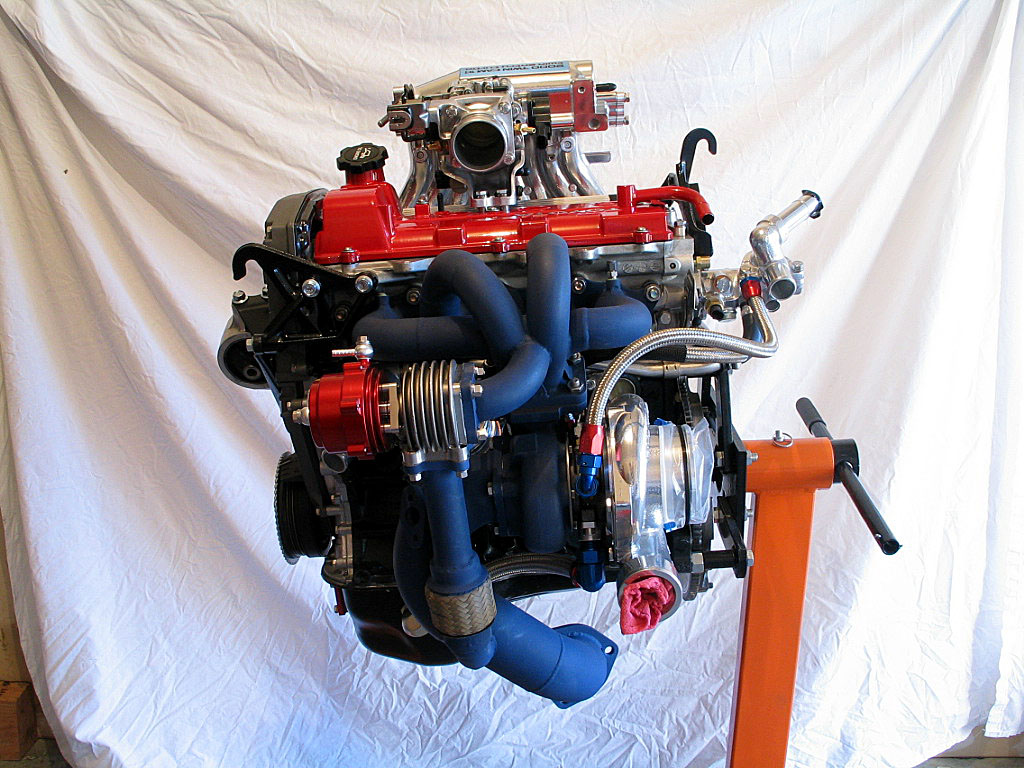
Once Alex had completed his work on the motor, it was up
to me to get all the rest of the pieces installed. Here's the motor after
I got it back:

|
|
| |
The assembly sequence was dictated by many things. As it proceeded, I kept
finding things I needed to buy or fabricate, so in the interim I would try
to move forward by assembling another part or system. It was very
frustrating, as it always seemed like something was going wrong, but I
guess that's to be expected when you change the OEM specs to something
new.
|
|
| |
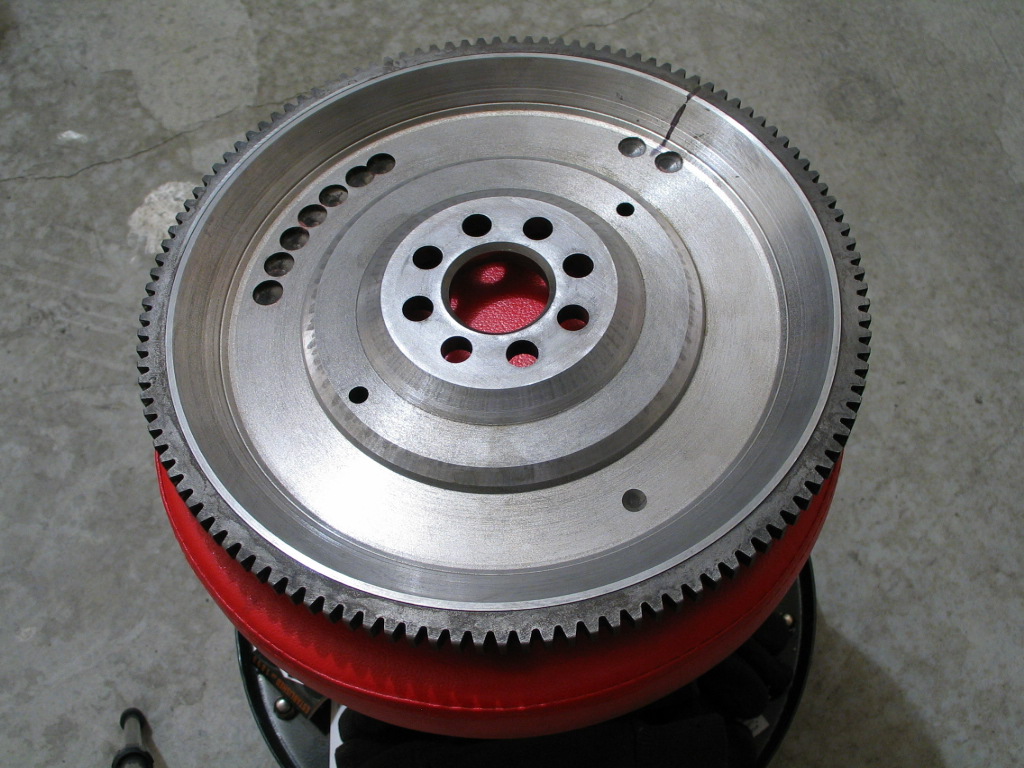
First, I installed the flywheel, while the motor was still hanging from
the hoist. Vegas machine had lightened and balanced the
stock flywheel:

I used ARP flywheel bolts, which require a 19mm 12-point socket.
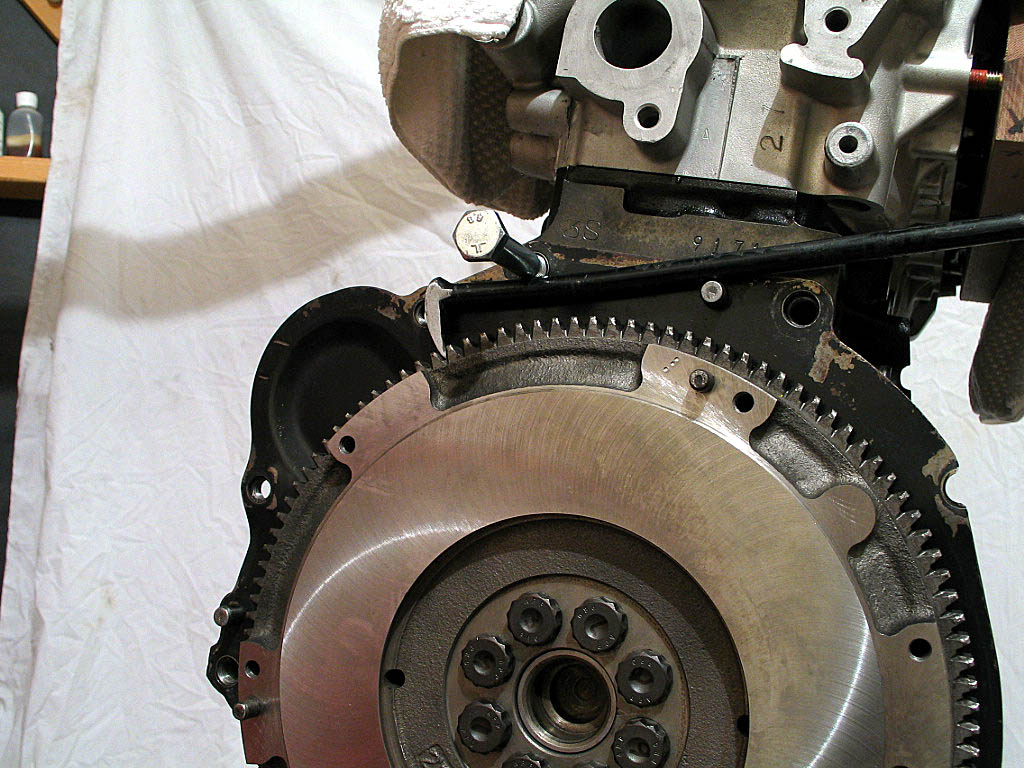
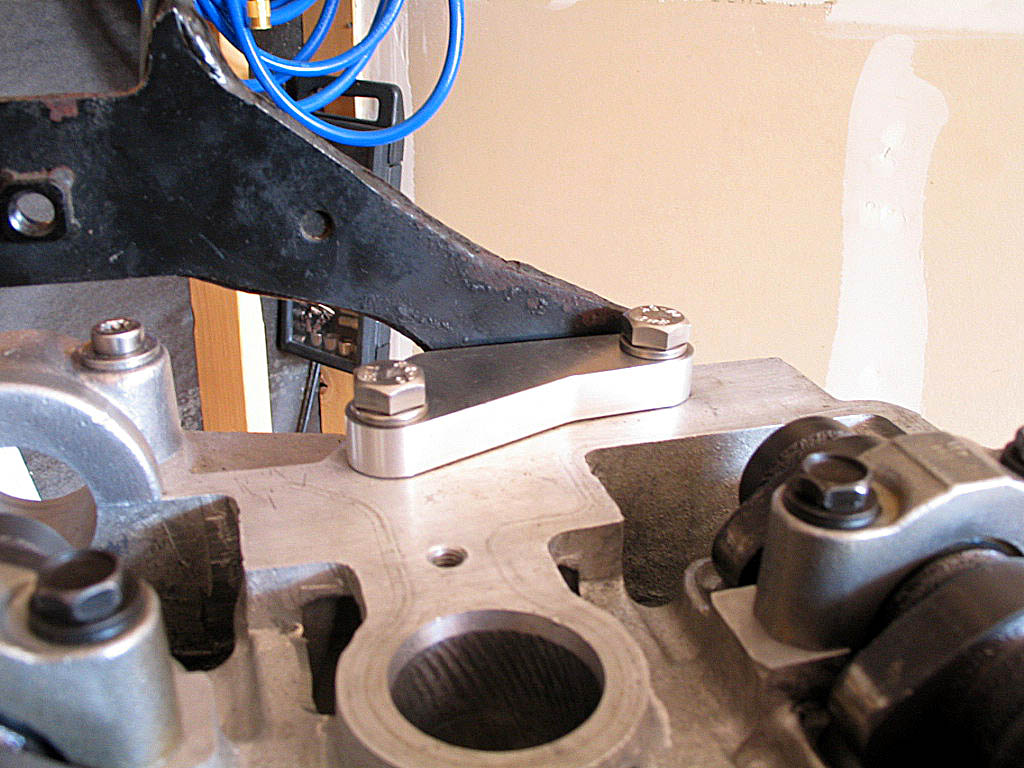
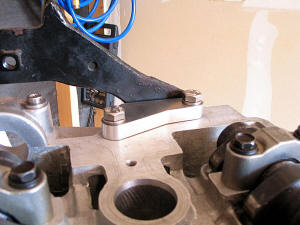
To hold the flywheel in place, I used a trick I discovered during removal. I had a combination drift pin and pry bar from Harbor Freight. I threaded a bolt into one of the
mounting holes for the transaxle, and placed the handle between the bolt
and one of the steel locating dowels in the block, as shown below:
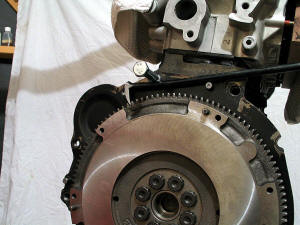
The foot fits in between the gear teeth, and it actually holds tighter the
more pressure you use on the bolt heads. A perfect tool for only a couple
of dollars. It also works well for installing/removing the harmonic
dampener bolt on the other side of the motor.
I numbered the bolt heads with a Sharpie marker to match the BGB's
tightening sequence, so I could keep track of which bolt I was tightening.
(OK, so I'm obsessive about some things.)
With the flywheel in place, I put the motor on an engine
stand, making it easier to work on.
|
|
| |
I installed the lower timing belt cover:

I couldn't install the upper cover just yet, as I needed to add a cam
timing sensor for the TECł and I also needed to cut holes for adjusting
the cam gears.
|
|
| |
I installed an EGR block-off plate on the cylinder head, as the EGR system
was not going back on the motor. I got a set of these plates
from MRControls in a group buy:
|
|
| |
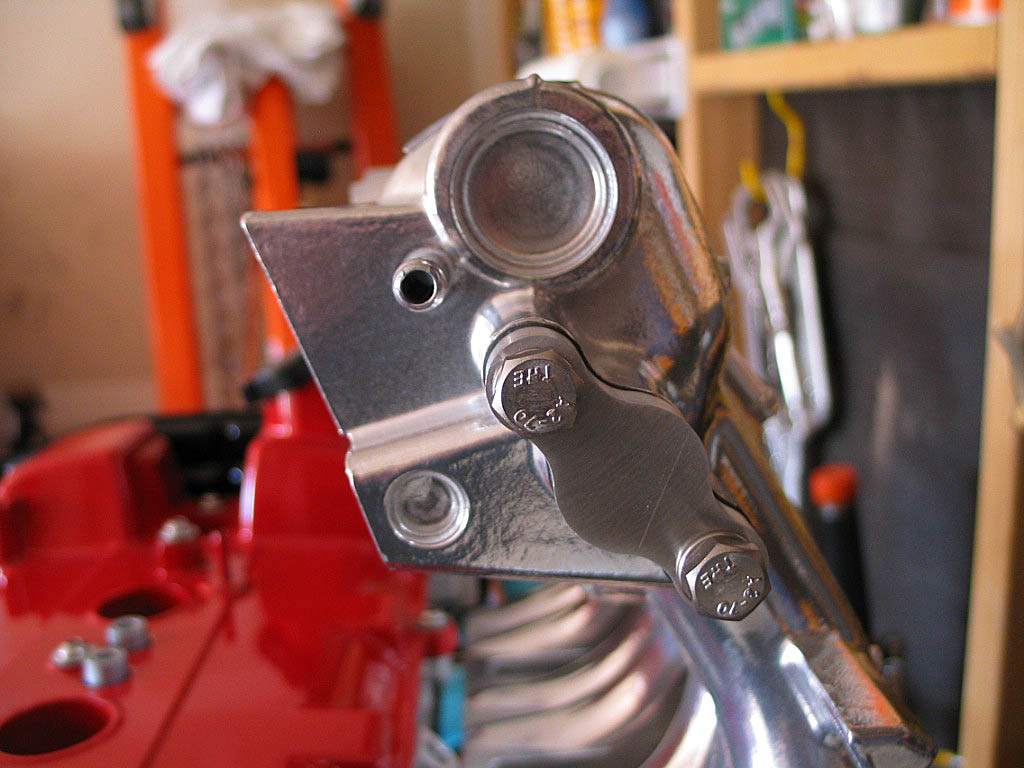
I installed new exhaust manifold
studs. I used a high temperature thread lock, and torqued them down to
spec:

|
|
| |
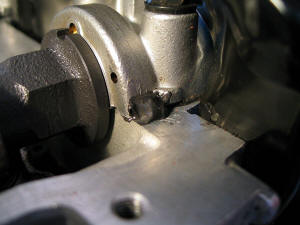
Next, I installed new exhaust manifold gaskets, and dry fitted
the manifold onto the studs. That's when I realized that one of the EGT
bungs was blocked:
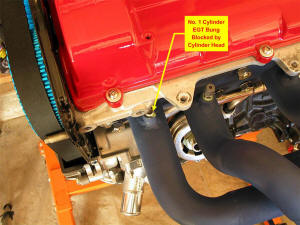
Oh, well. At least I'd have access to three of the exhaust runners for
temperature measurement.
|
|
| |
I installed new intake manifold studs with a medium strength thread lock
compound, so I could dry fit the intake manifold and see how clearances
were working out.
The cam cover gasket on the 3S-GTE has a tendency to leak at the front
of the head, where the cam bearing cap meets the head surface. A little
sealant in the corners is usually enough to prevent this:
I used Permatex Ultra Black RTV sealant. It's suitable for high
temperatures and is O2 sensor-safe. New valve cover gaskets, of course
(Toyota Part Nos. 11213-88381 and 11214-88381).
|
|
| |
I used stainless steel button head socket screws and sealing washers that
look a bit neater than the stock screws (at least in my opinion):
Be very careful when torquing the valve cover screws. The measurement is
in inch-pounds, not foot-pounds.
Sharp-eyed observers might note that the cover is an older (91-92) style
cover. I'd bought this cover a while back, and then had it powder coated.
|
|
| |
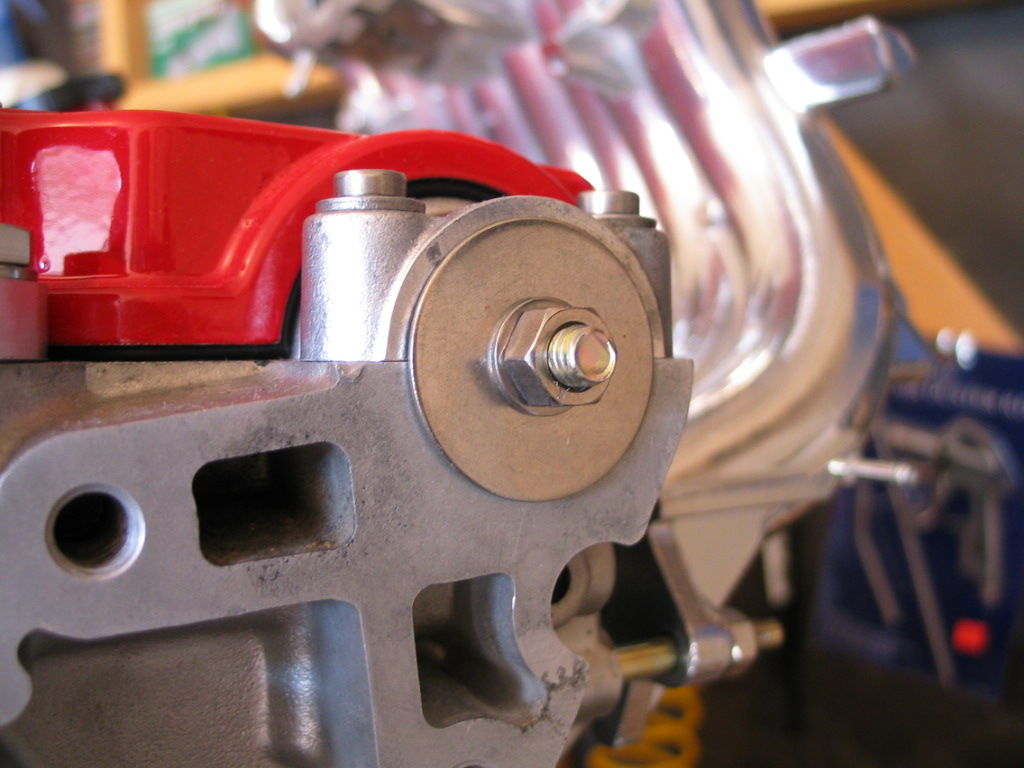
Since the TECł includes a direct ignition component, I wouldn't need the
distributor. I plugged the hole with a universal hole plug:

The plug is just a rubber seal with a through-bolt that expands the seal to fill
the hole. I replaced the stock washer with a stainless one for
appearance's sake.
|
|
| |
Next, I installed the other EGR block-off plate on the intake manifold:

|
|
| |
Continued on next page... |
|
|
|
|
|
Back to Start
Page
1
2 3
4 5
6
7
8
|
|
|
|
|
|
|
|
|
|
|


